Sunday, July 8, 2012

Safely Rolling on New Tires and Wheels


Our Luxe Land Yacht is in need of new shoes... tires and wheels to be exact!  The Cooper tires that came with our Sovereign are cracked and showed some real aging.  I could not see us ever making a trip on those tires, so it's out with the old and in with the new.

Arriving via UPS from eBay we picked up the BF Goodrich Commercial T/A tires.  The tires were $170 each, not cheap, but they are load rated "E", have great reviews on airforums.com, and should fit in the wheel wells.  They were delivered by UPS right to our door.  We are upgrading from 15" to 16" tires, just so that we could get into that next echelon of tire quality and selection.  I expect to get 5-6 good years out of these tires.


 To complement our new rubber, I searched for aluminum 16" wheels and stumbled upon Tredit.com which just happens to have one of their 7 locations a mile from my office.  Very helpful staff pointed me to the wheel I was looking for - the TR4 Mod 16" aluminum wheel.  This wheel was designed to compete with Alcoa's wheels at a fraction of the price.  Again Airforums.com confirmed that the wheels are up to par, so I will be having the new BF Goodrich tires installed on these rims this week.


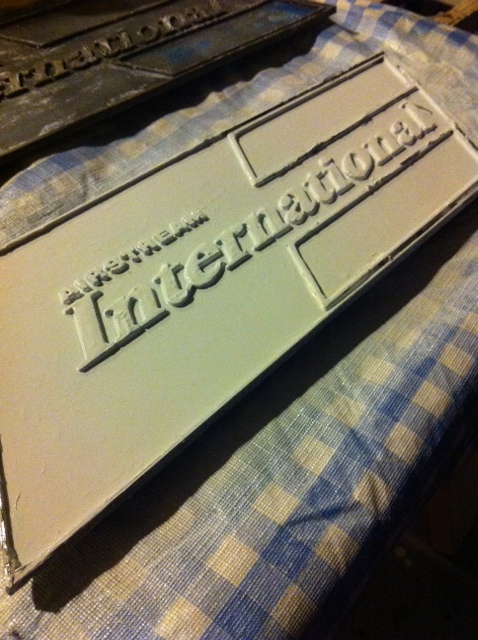
I expect the tire/wheel combination to look like below:


Much better looking (and safer I hope) than our current setup.


Tuesday, May 15, 2012

Septic Updates and More Subflooring

Replacing the plywood subfloor has been a chore which has gone fairly quickly... until we reached the fresh, gray, and black water tanks.  All the tanks needed new valves and hoses.

The black water drains from the left, and the grey from the right.  For those still learning about RV's, the black water only comes from the toilet, the grey water is from the shower and sinks.  Ideally you would empty the black water tank with one valve, then flush the line with the grey water using a second valve.  Unfortunately our valves were no longer water tight.


3" and 1.5" PVC were used for the new tank connections along with new Valterra valves (replacing Thetfords).  The valves are actuated from outside the Airstream via push rods and handles.  I read that some valves are now coming with 12v motors, but that's just 1 more think to break.


 You can really see the subfloor progress in this photo.  We're about half way done here!

A few more pieces of subflooring are installed now.  You can see the new Sealand 4-bolt toilet flange (odd because most toilets just have 2 bolts) and our 10 gallon water heater.  The water heater will be powered by either propane or 110v electricity if available.  The hole in the floor just below the toilet flange is the black water vent that will travel up through the roof.  The hole in the floor above the toilet flange is where all the grey water enters the grey holding tank.

Getting close to completing the subflooring.. check back and see our progress soon!!

Monday, April 30, 2012

Flooring and Leaks

This weekend we continued to work on the floor. We are about 1/3 of the way done replacing the floor!

We also filled up our fresh water tank for the first time to test it out. It didn't leak and all seems to be good with it so we are going to keep it and continue putting new pieces of flooring down.

While we were working on the Airstream this weekend we had a huge rainstorm which ended up working out really well for us to find all the places that leak in our Airstream!


We went around with vulkem and patched all of the leak spots. Mainly we had leaks around our tail lights, around the lower small windows, the door lock, and one random hole in the shell so not too bad!

We had rain all weekend so, after we filled in the problem areas we haven't seen anymore leaks.

Lastly, we got to put the banana wrap back on the front right side. The left is still open because we need to be able to bolt our next piece of flooring in from that side.

This week's work felt great because we are no longer deconstructing we are making her water-tight and beautiful!

Monday, April 23, 2012

Out with the old sub-floor and in with the new

Ever since we bought our Airstream we knew the day would come when we would take out the old sub-floor and see if our frame was rusted out or if we would get lucky and find it completely dry underneath with no problems!

Well, this past week, we removed the front section of floor. The plywood looked like it had some water damage but thankfully the metal frame wasn't too bad! We had some rust and some rivets come unattached from the belly pan but we could work with it.

A Little Rusty

Our Frame
To remove the front piece of ply wood we cut it into pieces with a circular saw, chopped at it with a hammer, and wrestled it out. We tried un-bolting and un-screwing it but, the bolts and screws holding the plywood in place were rusty and impossible to move. Once the wood came out we got the grinder after the remaining bolts and screws.

Grinding Old Rusty Bolts Off

To prevent any further damage from rust on our frame, we cleaned all the rust off we could with a wire brush. Then we spray painted all of the metal with Rustoleum Rusty Metal Primer then gave it a top coat of enamel spray paint.

See the Matt's feet?
We bought a new piece of ply wood and cut it to fit the front section of the Airstream. We made a template with a piece of foam and then used that to trace our cut we needed to make on the plywood. Once the wood was cut, we painted it with two coats of Polyurethane to protect it from any water that may try to sneak in (water is tricky like that!).

Once the spray paint and poly were all nice and dry we laid down some insulation. Then, it was time to put the new piece of flooring in. The plywood goes into a track at the base of the shell of the Airstream walls. We got the plywood into the track on the right side and then hammered the piece into place about 1/2 an inch at a time. It is a tight fit and the wood doesn't slide in easily but, once we pounded our piece into place it felt nice and firm. We went around the edges and re-bolted the places near where there were bolts before (we had to redrill some holes to hold our new bolts).

New pretty plywood
We went around with Vulkem to water-proof specifically around the metal sheet where the spare tire goes.

Next up we will keep replacing the old flooring until we get to the water tanks then we will see what kind of shape they are in before we continue laying new floor. We will also put the front two pieces of banana wrap back on since we had to take it off to put the bolts in around the edges of our flooring.

This has been my favorite project so far in our Airstream renovation because we are adding to the structural integrity of our trailer and hopefully adding many many years to it's life!

Saturday, April 21, 2012

How to Refurbish Airstream Emblems

As you can see, our Airstream emblem needed to be refreshed.


Here's how I went from the above picture to this!


First, removed the emblem but, in order to do that you have to remove the inner skin off the Airstream to get to the posts on the inside of the outter skin. The emblems are held on by posts that are attached with a type of nut then covered with vulkem to make it waterproof. Here's what it looks like-

Vulkem Covered Post
Post Without Vulkem
Back of the Emblem
My emblem had silicone around the edges also so I had to run around that with an exacto knife.

Once you get the emblem off, it's time to clean off the dirt and old paint.

I first covered the emblem with Citristrip paint stripper. The scrubbed and rinsed. This got alot of the paint off but not all.

Next, we polished the emblem with rouge and a polisher. This brought the letters to a beautiful shiny  finish.

Next up is painting. In order to protect the letters from paint you need to cover the letters with a thin coat of Vaseline. I used a Q-tip and my finger to keep the Vaseline only on the letters that you don't want paint on.
The Emblem Cleaned Up and with Vaseline
 Next, spray paint the entire emblem with white glossy spray paint for metal. I did two coats.


After the emblem has 24 hours to dry, scrape the Vaseline off the emblem. I used my finger nails and an exacto knife.

After Scraping off the Vaseline
Next, I used oil based model/hobby paint from Michael's to paint the red and blue areas. To do this, I dipped a small paint brush in the paint and dropped it in the square. The paint runs into the corners without having to use too many brush strokes. Allow the paint to flow on it's own and guide it with the brush. This will give the paint a thick professional look. I gave each color two coats.
 
Lastly, I sprayed two coats of glossy clear coat over the whole emblem. This gives the work you've done protection from the elements and a nice glossy finish!


I still need to do this same process for the Airstream Letters that go on the front and back of the trailer. I plan to use the same blue hobby paint that I used for this emblem to repaint those, I'll update when I get to that!

Sunday, March 11, 2012

Tail Lights and Trailer Tongue Makeover

Winter has kept us away from working on our Airstream but this weekend we had a fantastic day to be outside with our Airstream! So, we cleaned up the taillights and trailer tongue to make them look shiny and new again.


Ever little step makes our Airstream more and more beautiful! We'll have more projects as the weather gets warmer and more blog updates!